ベーシック アドベントカレンダー 4日目です。
Web Components を支える1要素 Templates と Slot はシンプルながら強力な機能です( Templates 自体は当然単体で使えます)。その名の通りテンプレートとして使えるのと、テンプレート内部をコンポーネント外部から要素を注入できる Slot を活用することで簡単に表現豊かな HTML 構造を作ることができます。
Templates ( HTMLTemplateElement )
まずは Custom Element や Shadow DOM 関係なく Templates 単体での利用方法を紹介します。
<template id="my-template">
  <p>this is template</p>
</template>
<script>
  const template = document.querySelector('#my-template')
  const node = document.importNode(template.content, true)
  // or use cloneNode()
  // const node = template.content.cloneNode(true)
  document.body.appendChild(node)
</script>
<template> タグ自体はブラウザは何も表示しませんし評価しません。これを document.importNode() を使ってテンプレートを複製します。そして body に追加することでテンプレートを元にしたノードを作成することができています。
これだけだとテンプレートっぽさがないので表組みでテンプレートを使ってみます。
<table>
  <template id="my-table">
    <tr>
      <td></td>
      <td></td>
    </tr>
  </template>
</table>
<script>
  const template = document.querySelector('#my-table')
  for (let i = 0; i < 5; i++) {
    const node = document.importNode(template.content, true)
    const cells = node.querySelectorAll('td')
    cells[0].textContent = `key ${i}`
    cells[1].textContent = `value ${i}`
    document.querySelector('table').appendChild(node)
  }
</script>

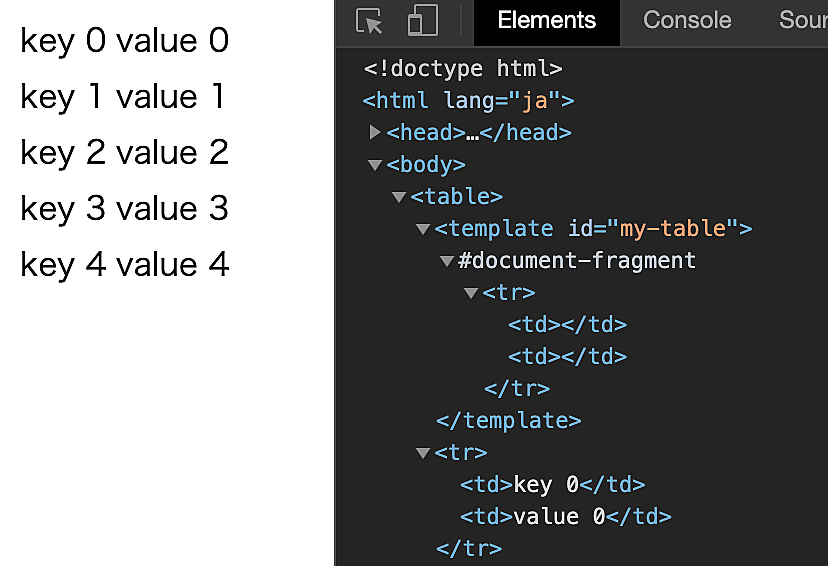
テンプレートを使って複数のノードを作ったのでテンプレートっぽさが出てきました。
Slot ( HTMLSlotElement ) を使って柔軟にする
上記のように Templates 単体でも十分機能を果たしますが Slot と一緒に使うことで Web Components としての柔軟性を手に入れることができます。まずは Templates を Custom Element で使うサンプルから。
<template id="my-template">
  <p>this is template</p>
</template>
<my-template></my-template>
<script>
  class MyTemplate extends HTMLElement {
    constructor() {
      super()
      const template = document.querySelector('#my-template')
      this.attachShadow({mode: 'open'})
      this.shadowRoot.appendChild(template.content.cloneNode(true))
    }
  }
  customElements.define('my-template', MyTemplate)
</script>

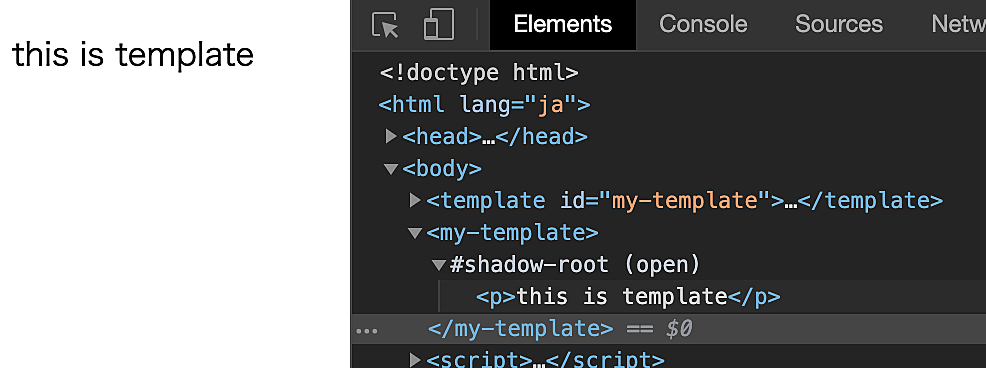
これは単体で Templates を使うのと変わりがありません。ここに Slot を導入してみます。
<template id="my-template">
  <slot name="paragraph">default paragraph</slot>
</template>
<my-template>
  <p slot="paragraph">slotting paragraph</p>
</my-template>
<script>
  class MyTemplate extends HTMLElement {
    constructor() {
      super()
      const template = document.querySelector('#my-template')
      this.attachShadow({mode: 'open'})
      this.shadowRoot.appendChild(template.content.cloneNode(true))
    }
  }
  customElements.define('my-template', MyTemplate)
</script>
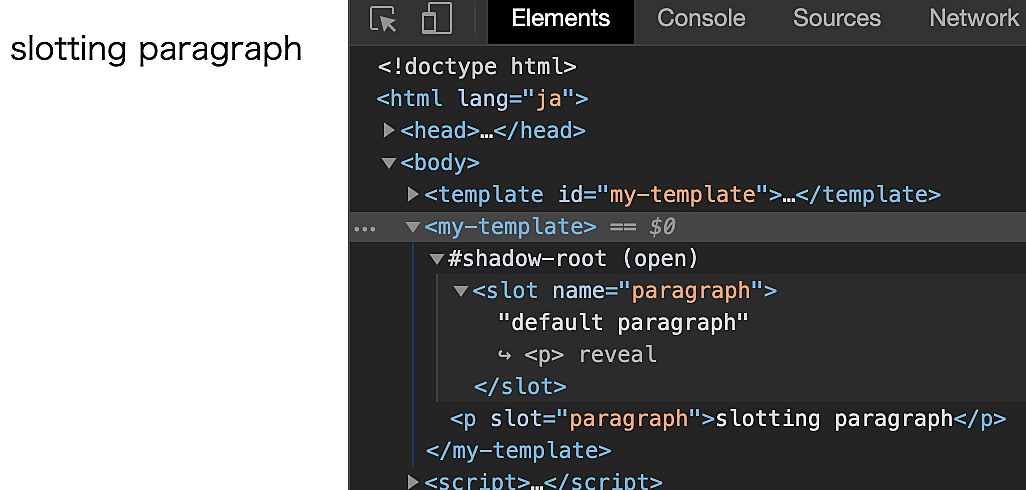
<slot> タグを <template> の内部に定義します。そうするとコンポーネントを利用する側から、Custom Element のタグの内部で定義したタグをテンプレート内に注入することができます。

Slot はデフォルト値の設定や、複数定義も可能です。Slot を活用することでコンポーネントが定義するデフォルトのテンプレート構造に、利用者側から独自の要素を注入した上で利用することができます。いいですね。
Templates / Slot をもっと活用する
Slot されたタイミングを知りたい
Slot に入ってきた要素に対して操作をしたくなるので、Slot に入ったイベントを求めて彷徨っていたのですが、普通に slotchange というイベントが用意されていました。
const slot = this.shadowRoot.querySelector('slot')
slot.addEventListener('slotchange', event => {
  slot.assignedNodes().forEach(node => {
  	console.log(`slotting element: `, node)
  })
})
ポイントは assignedNodes() を使わないと Slot された要素にはアクセスできないというところです。slotchange イベントを使えば、利用者側が動的に Slot 要素を入れ替えても対応が可能です。
Slot に対して CSS を適用したい
Slot された要素に対して CSS を適用するには ::slotted() を使う必要があります。
<template id="my-template">
  <style>
    p {
      color: #f00; /* not work */
    }
    ::slotted(p) {
      color: #f00;
    }
  </style>
  <slot name="paragraph">default paragraph</slot>
</template>
<my-template>
  <p slot="paragraph">slotting paragraph</p>
</my-template>
<script>
  class MyTemplate extends HTMLElement {
    constructor() {
      super()
      const template = document.querySelector('#my-template')
      this.attachShadow({mode: 'open'})
      this.shadowRoot.appendChild(template.content.cloneNode(true))
    }
  }
  customElements.define('my-template', MyTemplate)
</script>
Templates を外部管理したい
<template> はできれば外部ファイルとして管理したくなるような気がします。例えば Custom Element やコンポーネント JS ファイルの中で定義をしようとすると以下のようになります。
class MyTemplate extends HTMLElement {
  constructor() {
    super()
    this.attachShadow({mode: 'open'})
    this.shadowRoot.appendChild(this.template().content.cloneNode(true))
  }

  template() {
    const template = document.createElement('template');
    template.innerHTML = `<div><slot name="paragraph"></slot></div>`
    return template
  }
}

customElements.define('my-template', MyTemplate)
Shadow DOM の時もそうですが、ちょっと複雑な構造にすると微妙な感じがします。そこでテンプレートを外部の HTML ファイルにしてみます。そして fetch() で HTML ファイルを読み込むようにします。
class FetchTemplate extends HTMLElement {
  constructor() {
    super()
    this.attachShadow({mode: 'open'})

    fetch('./template.html').then(response => {
      return response.text()
    }).then(text => {
      const template = document.createElement('template')
      template.innerHTML = text
      this.shadowRoot.appendChild(template.content.cloneNode(true))
    })
  }
}

customElements.define('fetch-template', FetchTemplate)
多少はスッキリしました。ただ、読み込むファイル数が増えているのでネットワークが弱い状況の場合は、正常に表示されるまで時間がかかる可能性もあります。
困っていること
Slot 要素から @keyframes などが参照できずアニメーションが動かない
これはバグなのか議論中のものなのかが正しく認識できていないのですが、現時点では Slot 要素から @keyframes などが参照できずアニメーションが動きません。回避策としては Slot じゃない別の要素にたいしてアニメーションスタイルを当てるなどがありますが…ちょっと面倒くさいです。
class PhotoGallery extends HTMLElement {
  constructor() {
    super()
    this.attachShadow({mode: 'open'})
    this.shadowRoot.appendChild(this.template().content.cloneNode(true))
  }

  template() {
    const template = document.createElement('template');
    template.innerHTML = `
<style>
@keyframes slide {
  from {
    transform:translateX(0px);
  }

  to {
    transform:translateX(100px);
  }
}
::slotted(img) {
  animation: 3s slide;
}
</style>
<div class="gallery">
  <slot name="photos"></slot>
</div>
`
    return template
  }
}

customElements.define('photo-gallery', PhotoGallery)
<photo-gallery>
  <img src="./1.jpg)" slot="photos">
  <img src="./2.jpg)" slot="photos">
  <img src="./3.jpg)" slot="photos">
</photo-gallery>
このように <slot> に画像をいれて、その画像をスライドさせるアニメーションコンポーネントを作ったとします。しかしこれは動きません。 ::slotted(img) からは slide の @keyframes が参照できないという状況です…。
逆にグローバルな @keyframes は参照できてしまいます。
<style>
@keyframes slide {
  from {
    transform:translateX(0px);
  }

  to {
    transform:translateX(100px);
  }
}
</style>
<photo-gallery>
  <img src="./1.jpg)" slot="photos">
  <img src="./2.jpg)" slot="photos">
  <img src="./3.jpg)" slot="photos">
</photo-gallery>
このようにコンポーネントの外(Shadow DOM の境界外)に定義してあるものが適用されてしまっていて…これは…という感じです。この周辺の仕様については議論されているようですが、どのような方向性なのかまでは追えていません。
また、他の仕様提案として変数や関数機能を搭載したものもありますが、これも今後どうなるのかはわかりません。これはこれで良さそうに見えますが…どうなんでしょうね。
<template>
  <section>
    <h1>{{name}}</h1>
    Email: <a href="mailto:{{email}}">{{email}}</a>
  </section>
</template>
<script>
// snip
this.shadowRoot.appendChild(
  template.createInstance({
    name: "zaru",
    email: "zaru@example.com"
  })
)
</script>
という感じでシンプルながらも非常に強力な使い方ができる Templates と Slot の紹介でした。
